In this post, I have documented the steps I followed to install RHEL 8 by booting from a PXE server over the network with a Kickstart file using Synology NAS as TFTP, HTTP server, and UDM as DHCP.
Install and Configure TFTP
Trivial File Transfer Protocol (TFTP) is a simple file transfer protocol, generally used for transferring configurations or boot files when authentication is not required.
Synology NAS comes with TFTP file services
To configure TFTP
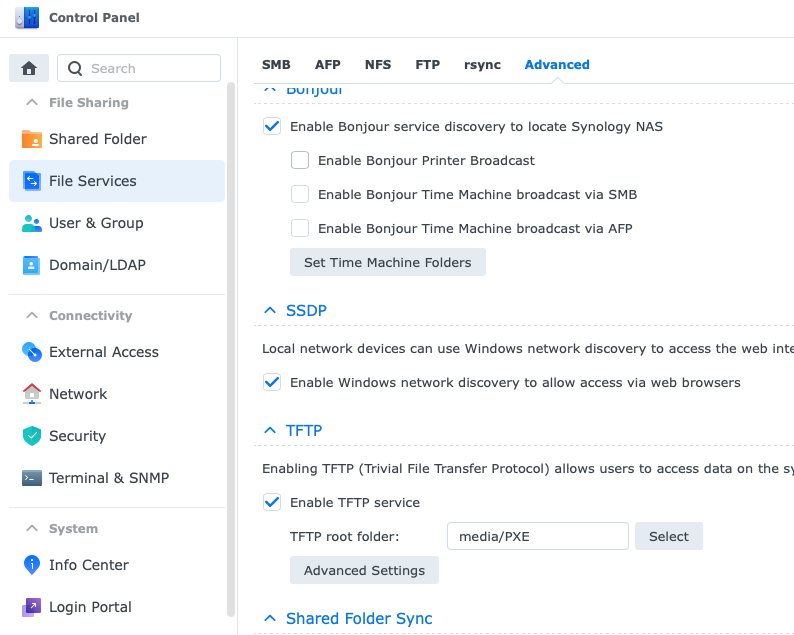
Go to Control Panel > File Services > Advanced
- Select
Enable TFTP Service - In the TFTP root folder field, specify which folder on the Synology NAS can be accessed by TFTP clients
Install and Configure HTTP server
We also need a service to host our image repository, we can use FTP or HTTP, or NFS to host our image repository. Synology NAS comes with web hosting features. In Web Station, we will create a port-based virtual host to host the contents of our image repository.
Install the following packages from the Synology package center
- Web Station
- Apache HTTP Server 2.4
Create a virtual host
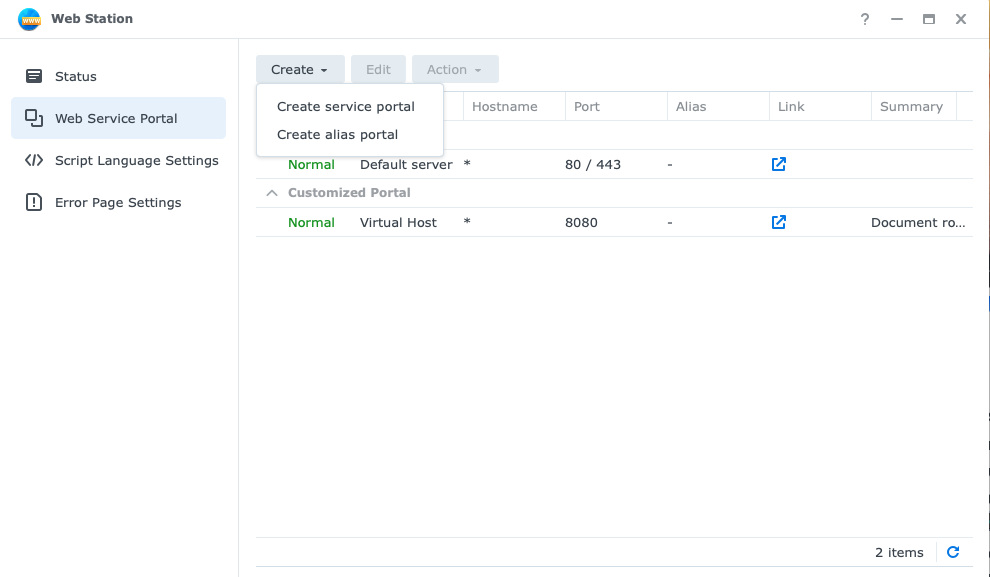
Open Web Station and go to Web Service Portal > Select Create Service Portal
Select Virtual Host
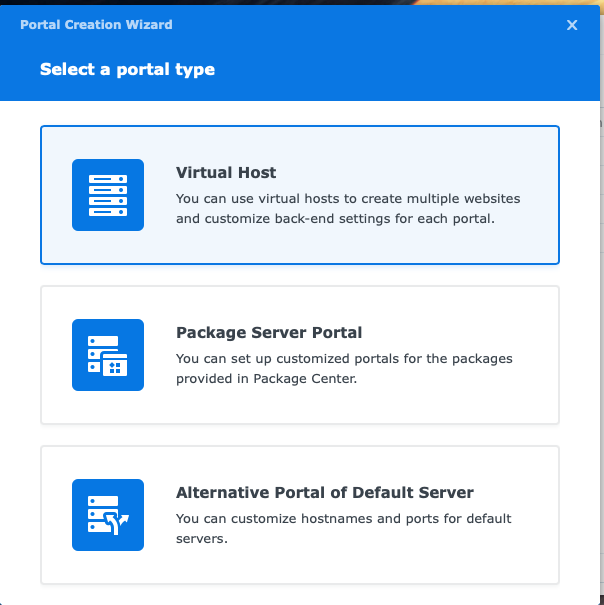
In the virtual host wizard
- Select Port-based with protocol as
HTTPand enter port number8080 - Select the
Document rootdirectory which is the same PXE location as TFTP - Select Apache HTTP Server as the back-end server
- Click Create to save settings

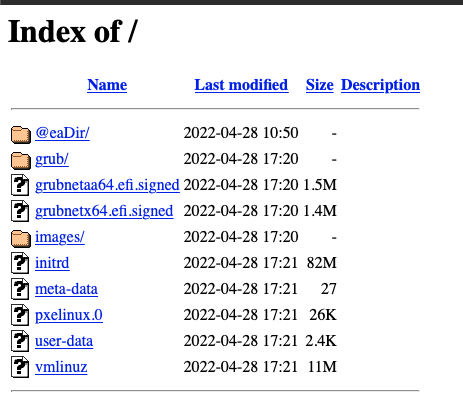
We need to enable simple directory browsing on the virtual host we just create to access the contents of images and configuration files to perform PXE Boot.
In the Document root directory create a file named .htaccess with the following content
Options +Indexes
Navigate to IP:8080 and you should see a similar screen with files in the folder
PXE Boot setup
Prepare Installation Repository
- Download the ISO image file of the full installation DVD
- Create a directory named
images/rhel/8.6under root directory of TFTP/HTTP server - Mount the ISO image
- Copy all the files from the ISO to the previously created directory on TFTP/HTTP server. You will need around 10GB of storage to copy all the files from the ISO to the local directory.
mount rhel-8.6-x86_64-dvd.iso /mnt
scp -pr /mnt/* nas-user@nas-address:/media/PXE/images/rhel/8.6
To perform UEFI PXE Boot installation, we will need the following PXE boot files
- grubx64.efi provided by grub2-efi-x64 rpm
- shimx64.efi provided by shim-x64 rpm
- BOOTX64.EFI provided by shim-x64 rpm
cp -pr /mnt/BaseOS/Packages/grub2-efi-x64-2.02-81.el8.x86_64.rpm /tmp
cp -pr /mnt/BaseOS/Packages/shim-x64-15-11.el8.x86_64.rpm /tmp/
Extract the packages
cd /tmp
rpm2cpio shim-x64-15-11.el8.x86_64.rpm | cpio -dimv
rpm2cpio grub2-efi-x64-2.02-81.el8.x86_64.rpm | cpio -dimv
Copy the EFI boot images from the /tmp directory to the PXE root directory
scp /tmp/boot/efi/EFI/BOOT/BOOTX64.EFI nas-user@nas-address:/media/PXE
scp /tmp/boot/efi/EFI/centos/shimx64.efi nas-user@nas-address:/media/PXE
scp /tmp/boot/efi/EFI/centos/grubx64.efi nas-user@nas-address:/media/PXE
Add a configuration file named grub.cfg to the TFTP/HTTP root directory. We need initrd and vmlinuz files to load the Operating System until the hard disk and other interfaces are detected. In the grub.cfg take a note of linuxefi and initrdefi I am referring to TFTP/HTTP image directory location.
set timeout=30
menuentry 'Install RHEL 8.6 on T7910' {
    linuxefi images/rhel/8.6/images/pxeboot/vmlinuz inst.stage2=http://192.168.100.160:8080/images/rhel/8.6 quiet
    initrdefi images/rhel/8.6/images/pxeboot/initrd.img
}
Prepare kickstart file
Next, we will create our kickstart file to have an unattended automated installation. I have used the Kickstart Configuration Tool available at https://access.redhat.com/labs/kickstartconfig/ in the Red Hat Customer Portal Labs. This tool will walk you through basic configuration and allows you to download the resulting Kickstart file.
- Create a new directory named
ksunder the root directory of TFTP/HTTP server to store the kickstart file for the UEFI PXE Boot purpose - Copy the downloaded kickstart file into the previously created location
scp kickstart.cfg nas-user@nas-address:/media/PXE/ks
- Update the
grub.cfgto use the kickstart file during installation. Theinst.ks=boot option specifies the location of the kickstart location
The final grub.cfg will look like this:
set timeout=30
menuentry 'Install RHEL 8.6 on T7910' {
    linuxefi images/rhel/8.6/images/pxeboot/vmlinuz inst.ks=http://192.168.100.160:8080/ks/rhel8-t7910.cfg inst.stage2=http://192.168.100.160:8080/images/rhel/8.6 quiet
    initrdefi images/rhel/8.6/images/pxeboot/initrd.img
}
Perform PXE boot
We are all set up to perform UEFI PXE Boot. The shortcut button to boot over the network may vary for different hardware but in most cases we are expected to press F12 to boot from the network:
If your UEFI PXE Boot Server configuration is proper, then the TFTP files should get successfully